Introduction
The sleek, modern appeal of linear shower drains has revolutionized bathroom design, offering both aesthetic upgrades and practical advantages over traditional point drains. However, like any plumbing fixture, these elegant drainage solutions can develop issues over time. Whether you’re encountering slow drainage, unpleasant odors, or concerning leaks, understanding how to troubleshoot and repair your linear shower drain can save you considerable time, money, and frustration.
This comprehensive guide addresses the most common problems homeowners face with linear shower drains and provides practical, step-by-step solutions to restore optimal performance. From basic maintenance to more complex repairs, we’ll equip you with the knowledge to tackle these issues confidently before resorting to costly professional services.

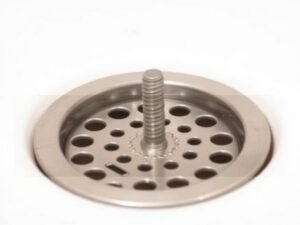
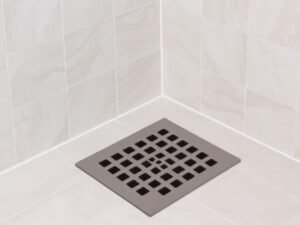
Close-up of stainless steel linear drain showing cover, channel body and outlet components
Common Linear Shower Drain Problems: Identifying the Issues
Linear shower drains typically consist of a channel body, removable cover, waterproofing elements, and connection to the drainage system. Understanding this basic structure is essential when troubleshooting problems. Here are the five most common issues homeowners encounter:
1. Slow Drainage
When water begins pooling around your feet during showers or takes noticeably longer to drain, the culprit is typically an obstruction within the drain channel or deeper in the plumbing system. This gradual development often indicates accumulated hair, soap scum, or mineral deposits restricting water flow.
2. Unpleasant Odors
Foul smells emanating from your linear drain typically signal organic matter decomposition within the drain or a dry P-trap that’s allowing sewer gases to enter your bathroom. These odors rarely resolve without intervention and may indicate more serious issues if left unaddressed.
3. Water Leakage
Perhaps the most concerning problem, leaks can manifest as water seeping from beneath the drain flange, moisture in adjacent rooms, or water damage on ceilings below. Causes range from failed seals to improper installation or structural damage to the drain unit itself.
4. Corrosion and Rust
Even high-quality stainless steel drains can develop corrosion if exposed to harsh chemicals or if lower-grade materials were used in manufacturing. Rust not only compromises aesthetics but can eventually affect structural integrity and lead to leaks.
5. Unusual Noises
Gurgling, bubbling, or rattling sounds during drainage often indicate air flow issues in the plumbing system, loose components, or partial blockages creating turbulent water flow.
Before attempting any repairs, gather these essential tools:
- Screwdriver set
- Plumber’s snake or drain auger
- Silicone sealant (bathroom-grade)
- Rubber gloves
- Flashlight
- White vinegar
- Baking soda
- Commercial drain cleaner (enzyme-based)
- Plumber’s tape
- Cleaning brush with long handle
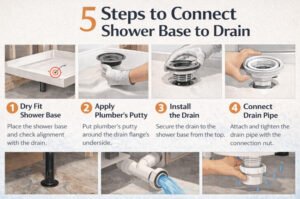
Diagnosing Linear Shower Drain Problems
Identifying Causes of Slow Drainage
The first step in addressing slow drainage is determining whether the clog is near the surface or deeper in the system:
- Remove the drain cover according to manufacturer specifications (typically by lifting straight up or using provided tools for secured covers).
- Examine the visible channel for obvious obstructions like hair clumps or soap buildup.
- If the channel appears relatively clean, the blockage likely resides deeper in the plumbing system.
- Test drainage after removing surface debris to determine if further action is needed.
Specialized linear drain designs require specific approaches. For example, tile-insert drains need more careful cover removal to avoid damaging surrounding tilework.
Locating Water Leaks
Detecting the exact source of leaks requires methodical investigation:
- Examine the drain flange (the edge where the drain meets the shower floor) for any gaps, cracks, or failed sealant.
- Check the connection points where the drain body attaches to drainage pipes.
- Inspect the waterproofing membrane around the drain (if visible) for tears or separation.
- For second-floor bathrooms, check ceilings below for water damage patterns that might indicate the leak’s origin.
Understanding that multiple leaks may be present is important – addressing only the most obvious one might leave hidden problems untreated.
Determining Causes of Odor Problems
Persistent drain odors typically stem from:
- Biofilm buildup – slimy bacterial colonies forming on interior drain surfaces
- Dry P-trap – evaporated water barrier allowing sewer gases to rise
- Mold or mildew growth in moist areas around the drain
- Food particles or organic matter trapped in the drainage system
A simple test involves pouring a few cups of water down the drain and checking if odors temporarily subside (indicating a dry P-trap) or persist (suggesting buildup issues).

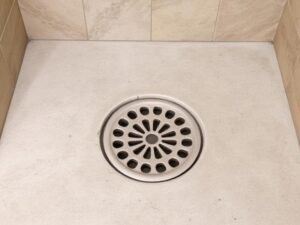
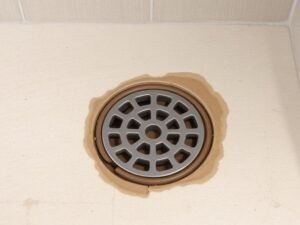
Diagram of linear drain blockage points highlighting hair trap, channel and P-trap areas
Step-by-Step Solutions for Linear Shower Drain Problems
Resolving Slow Drainage Issues
Method 1: Manual Cleaning
- Remove the drain cover following manufacturer instructions.
- Using gloved hands or tweezers, remove any visible hair and debris from the channel.
- Clean the underside of the cover where buildup often accumulates.
- For tile-insert covers, pay special attention to the narrow gaps around the perimeter.
- Rinse thoroughly with hot water to test drainage improvement.
Method 2: Natural Cleaning Solution
- After removing large debris, pour ½ cup baking soda into the drain channel.
- Follow with 1 cup of white vinegar.
- Let the mixture foam and work for 30 minutes.
- Flush with boiling water (if compatible with your drain material and plumbing).
- Repeat if necessary for stubborn clogs.
Method 3: Drain Snake Application
- Insert a small drain snake or auger into the drain outlet.
- Gently rotate while pushing deeper into the plumbing.
- Once you feel resistance (the clog), rotate the snake to break up the obstruction.
- Slowly retrieve the snake, which should bring debris with it.
- Flush thoroughly with hot water.
For Persistent Clogs:Consider using enzyme-based drain cleaners specifically formulated for shower drains. Avoid harsh chemical cleaners with linear drains, as they can damage metal finishes and rubber seals.
Fixing Leak Issues
Resealing the Drain Flange:
- Remove the drain cover and thoroughly clean the flange area.
- Remove old sealant using an appropriate solvent.
- Allow the area to dry completely (at least 24 hours).
- Apply a continuous bead of silicone sealant designed for bathroom applications.
- Smooth the sealant with a wet finger for a professional finish.
- Allow to cure according to manufacturer specifications before using the shower.
Addressing Connection Leaks:
- Access the drain connection point (may require access from below or removing shower base).
- Check if the connection is threaded or compression-based.
- For threaded connections, remove old plumber’s tape and apply fresh tape in a clockwise direction.
- For compression fittings, ensure the washer is intact and properly seated.
- Tighten connections carefully – overtightening can crack fittings.
Replacing Damaged Components:If inspection reveals cracked or damaged drain components, replacement is typically necessary:
- Purchase matching replacement parts (bring the original to ensure compatibility).
- Follow manufacturer instructions for disassembly and replacement.
- Apply appropriate sealants at all connection points.
- Test thoroughly for leaks before completing restoration of the shower area.
Eliminating Odor Problems
Deep Cleaning Protocol:
- Remove the drain cover and clean thoroughly with dish soap.
- Create a paste of baking soda and water.
- Using a bottle brush or specialized drain brush, scrub all interior surfaces of the drain channel.
- Pay special attention to corners and connections where biofilm accumulates.
- Pour boiling water mixed with white vinegar (1:1 ratio) down the drain.
- For persistent biofilm, consider specialized biofilm removal products.
Addressing Dry P-trap Issues:
- Pour 2 cups of water down the drain to restore the water seal.
- For rarely used showers, repeat monthly to prevent evaporation.
- Consider adding 1 tablespoon of mineral oil on top of the water to slow evaporation.

Photo demonstrating proper linear drain cleaning technique with brush and natural solutions
Treating Corrosion and Rust
For Surface Rust:
- Create a paste using equal parts baking soda and water.
- Apply to rusted areas with a non-abrasive cloth.
- Gently rub in a circular motion until rust dissolves.
- Rinse thoroughly and dry completely.
- Apply a thin layer of mineral oil to prevent future corrosion.
For Severe Corrosion:
- Remove the drain cover for treatment separate from the shower.
- For stainless steel, use a specialized stainless restoration product.
- For other metals, consider specific rust converters appropriate to the material.
- If structural integrity is compromised, replacement is safer than repair.
- When purchasing replacements, consider upgrading to marine-grade stainless steel (316 grade) for superior corrosion resistance.
Resolving Noise Issues
Fixing Gurgling Sounds:
- Ensure proper venting of the plumbing system, as gurgling often indicates air pressure issues.
- Check that the P-trap is functioning correctly and holds water.
- Remove drain cover and inspect for partial blockages creating turbulent flow.
Addressing Rattling Noises:
- Tighten any loose screws securing the drain cover.
- Check for proper support under the drain channel.
- Insert small rubber spacers between the drain cover and frame if movement is causing noise.
- Ensure the drain is properly secured to the subfloor structure.
Preventative Maintenance for Linear Shower Drains
Establishing a regular maintenance routine dramatically reduces the likelihood of developing serious drain issues:
Weekly Maintenance
- Remove visible hair and debris after showering
- Flush with hot water for 30 seconds to clear soap residue
- Wipe down visible drain surfaces to prevent buildup
Monthly Maintenance
- Remove and thoroughly clean the drain cover
- Apply a preventative cleaning solution:
- Pour ¼ cup baking soda followed by ¼ cup white vinegar
- Let sit for 30 minutes
- Flush with hot water
- Inspect seals and connections for early signs of failure
- Check for early signs of corrosion, particularly at joints
Quarterly Maintenance
- Perform a deeper channel cleaning using a specialized drain brush
- Test drainage rate to identify slowdowns before they become problematic
- Inspect the entire visible drain system for cracks, wear, or damage
- Re-apply sealant to the flange if showing signs of deterioration
Frequently Asked Questions
Q1: How often should I clean my linear shower drain?
Basic cleaning should be performed weekly, with deeper cleaning monthly. Households with long-haired residents or hard water may require more frequent maintenance.
Q2: When should I call a professional instead of attempting DIY repair?
Contact a professional plumber if: leaks persist after resealing, drainage issues continue after multiple clearing attempts, you notice water damage to surrounding structures, or if your drain requires disassembly beyond removing the cover and cleaning the channel.
Q3: Which linear shower drain materials are most durable and maintenance-friendly?
316-grade stainless steel offers optimal durability and corrosion resistance, particularly in areas with hard water. While more expensive initially, the reduced maintenance and longer lifespan often justify the investment. PVC and other polymer options require less maintenance but may lack the premium appearance of metal alternatives.
Q4: What’s a temporary fix for a leaking linear shower drain until permanent repairs can be made?
Apply plumber’s putty or silicone sealant around the drain flange as a temporary measure. Minimize shower use and place towels around suspected leak areas to prevent water damage. However, schedule permanent repairs promptly as temporary fixes can hide developing problems.
Q5: Can I use chemical drain cleaners on my linear shower drain?
Most manufacturers advise against harsh chemical cleaners as they can damage stainless steel finishes, deteriorate rubber gaskets, and harm the environment. Instead, use enzyme-based biological cleaners specifically formulated for shower drains or natural alternatives like baking soda and vinegar.
Conclusion
Linear shower drains offer significant aesthetic and functional advantages for modern bathrooms, but like all plumbing fixtures, they require proper maintenance and occasional troubleshooting. By understanding common issues and their solutions, homeowners can maintain optimal drain performance while extending the lifespan of these premium fixtures.
Most linear drain problems can be resolved with simple DIY approaches, saving the expense and inconvenience of professional service calls. Regular maintenance remains the most effective strategy, preventing small issues from developing into serious problems requiring costly repairs.
With proper care, your linear shower drain will continue to perform efficiently while maintaining its sleek, contemporary appearance for many years to come.