This comprehensive guide explains the key steps in installing a linear shower drain in a clear, professional, and practical manner. Whether you are a contractor, builder, designer, or homeowner planning a high-end bathroom renovation, following the correct installation process will ensure optimal performance, waterproof integrity, and long-term reliability.
In this article, we will walk through preparation, positioning, waterproofing, slope creation, drain installation, and final testing. We will also introduce an innovative wall-mounted solution, the Noahhometech E Series Linear Wall Shower Drain, and explain why it is an ideal choice for modern bathrooms.
Table of Contents
- Understanding Linear Shower Drains
- Why Proper Installation Matters
- Step 1: Planning and Preparation
- Step 2: Positioning and Subfloor Preparation
- Step 3: Waterproofing the Shower Area
- Step 4: Installing the Linear Shower Drain
- Step 5: Testing, Finishing, and Maintenance
- Noahhometech E Series Linear Wall Shower Drain
- Why Choose Noah
- Summary Table
- Frequently Asked Questions
- References
Understanding Linear Shower Drains
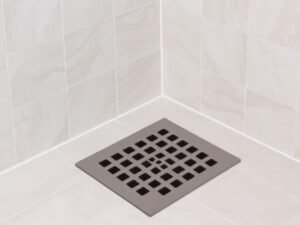
Before discussing the key steps in installing a linear shower drain, it is important to understand what a linear drain is and how it differs from traditional point drains. A linear shower drain is a long, narrow drainage channel that collects water along a line rather than at a single central point.
Linear drains allow for a single-direction floor slope, which simplifies tile layout and improves water flow efficiency. They are especially popular in modern bathrooms, accessible showers, and luxury residential or hospitality projects.
Why Proper Installation Matters
Incorrect installation can compromise drainage performance, cause water pooling, and lead to serious issues such as leaks, mold growth, and structural damage. Following the key steps in installing a linear shower drain ensures:
- Efficient water evacuation
- Long-term waterproof integrity
- Compliance with building codes
- A clean and modern aesthetic
- Reduced maintenance issues
Each step builds upon the previous one, making attention to detail critical throughout the process.
Step 1: Planning and Preparation
Assessing the Shower Layout

The first of the key steps in installing a linear shower drain is careful planning. Determine the shower dimensions, drain location, and tile layout. Linear drains can be installed at the wall, entrance, or center of the shower, but wall-mounted drains are increasingly preferred for their minimalist appearance.
Checking Plumbing and Codes
Confirm local plumbing codes regarding drain size, outlet diameter, and slope requirements. Proper compliance avoids future inspection issues and ensures safety.
Gathering Tools and Materials
Essential tools include a level, measuring tape, mortar, waterproof membrane, drain body, and compatible outlet fittings. Using high-quality materials from the beginning is one of the most overlooked but critical key steps in installing a linear shower drain.
Step 2: Positioning and Subfloor Preparation
Determining Drain Position
Correct positioning is fundamental. Wall-mounted drains are typically installed at the wall-floor junction, which allows the entire floor to slope in one direction. This simplifies installation and enhances visual cleanliness.
Preparing the Subfloor
The subfloor must be level, solid, and clean. Any movement or unevenness can compromise the drain alignment and waterproofing system.
Creating the Initial Slope
Even before installing the drain, pre-sloping the subfloor ensures water naturally flows toward the drainage channel. This is a vital part of the key steps in installing a linear shower drain.
Step 3: Waterproofing the Shower Area
Applying Waterproof Membranes
Waterproofing is one of the most critical key steps in installing a linear shower drain. A continuous waterproof membrane must be applied to the floor and up the walls, ensuring complete coverage.
Sealing Drain Connections
The drain body must integrate seamlessly with the waterproof membrane. Proper sealing prevents leaks at the most vulnerable junction in the shower system.
Quality Control Checks
Before moving forward, inspect all seams, corners, and penetrations. A flood test is recommended to confirm waterproof integrity.
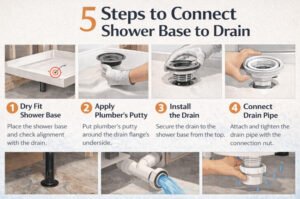
Step 4: Installing the Linear Shower Drain
Setting the Drain Body
The drain body should be installed at the correct height, aligned perfectly with the finished tile surface. Adjustable-height drains provide flexibility during installation.
Connecting the Outlet
Ensure the outlet size matches the plumbing system. Secure connections reduce the risk of leaks and blockages.
Final Floor Slope Adjustment
The finished floor must slope uniformly toward the drain at approximately 1 to 2 percent. Achieving this slope is one of the most technically demanding key steps in installing a linear shower drain.
Step 5: Testing, Finishing, and Maintenance
Water Flow Testing
Test the system with running water to confirm smooth drainage without pooling. Observe water movement carefully.
Tile Installation and Grouting
Once testing is complete, install tiles and grout according to manufacturer recommendations. Linear drains allow for larger tiles and cleaner lines.
Routine Maintenance Considerations
Regular cleaning and inspection ensure long-term performance. Removable strainers simplify maintenance.
Noahhometech E Series Linear Wall Shower Drain
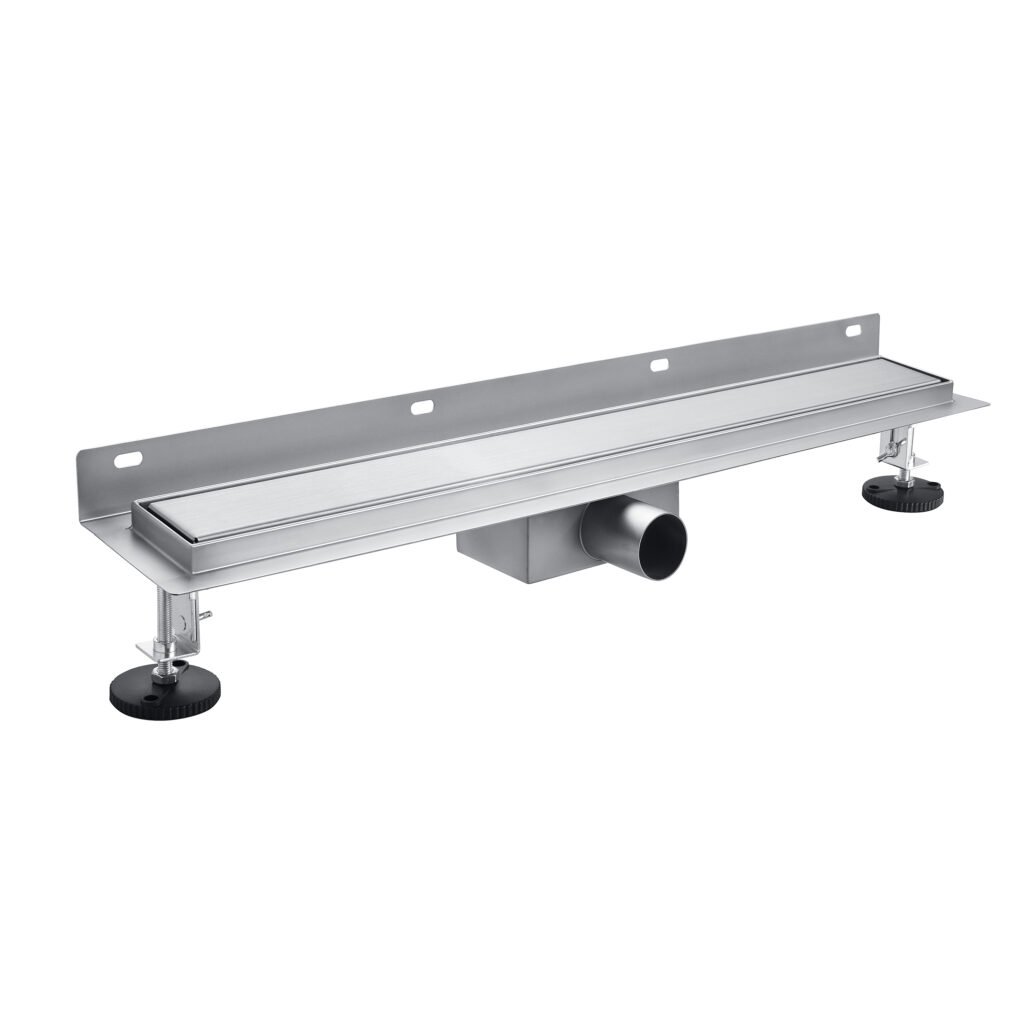
The Noahhometech E Series Linear Wall Shower Drain is a space-saving solution designed for modern bathrooms. By shifting drainage from the floor to the wall-floor junction, it creates a cleaner visual appearance while maximizing usable shower space.
- Length: 300 to 3000 mm
- Width: 70 mm
- Height: 75 mm
- Material: 304 or 316 stainless steel
- Flow Rate: 36 L per minute
- Outlet Size: 40 to 50 mm
- Drainage: Horizontal outlet
- Adjustable Height: 65 to 80 mm
- Free Sample: Available
Why Choose Noah
Founded in 2024, Noah specializes in designing, developing, and manufacturing professional drainage system products. With 11 years of expertise in drainage manufacturing, Noah delivers reliable solutions for construction and landscaping projects worldwide.
Noah is certified with ISO9001, CE, SGS, and other international standards. The company operates modern automated production lines with a monthly capacity of 1 million meters, ensuring consistent quality and fast delivery.
Whether you need trench grates, linear drains, or customized drainage solutions, Noah is a reliable drainage solutions manufacturer in China with a professional team and direct manufacturing capabilities.
Summary Table: Key Steps in Installing a Linear Shower Drain
| Step | Description |
|---|---|
| Planning | Assess layout, drain location, and materials |
| Subfloor Preparation | Level and slope the base toward the drain |
| Waterproofing | Apply continuous membrane and seal connections |
| Drain Installation | Set drain body, connect outlet, adjust height |
| Testing and Finishing | Test drainage, tile installation, final inspection |
Frequently Asked Questions
What is the biggest mistake during installation?
Skipping proper waterproofing is the most common and costly mistake.
Are wall-mounted linear drains better than floor drains?
Wall-mounted drains provide better aesthetics, easier floor slopes, and improved space utilization.
Can I install a linear shower drain myself?
Experienced DIYers can handle installation, but professional installation is recommended for best results.
References