Undertaking a bathroom renovation often leads to one of the most challenging yet rewarding tasks: installing shower drain in concrete floor. Whether you are building a new home or retrofitting an existing basement bathroom, dealing with concrete requires precision, the right tools, and a clear understanding of plumbing principles. Unlike wooden subfloors where access is often easier, concrete demands a “measure twice, cut once” mentality because mistakes can be labor-intensive to correct.
In 2026, modern bathroom designs have shifted towards sleek, minimalist aesthetics, often utilizing linear drains and curbless entries. These designs require specific attention to detail when installing shower drain in concrete floor to ensure proper slope and water management. Companies like Noahhometech have revolutionized this space with innovative products that simplify the installation process while offering superior durability and style.
This comprehensive guide will walk you through every phase of the project, from the initial demolition (if necessary) to the final waterproofing. We will explore the nuances of setting both standard center drains and modern linear drains, ensuring your project meets professional standards.
- 1. Understanding the Project Scope
- 2. Essential Tools and Materials
- 3. Planning and Layout
- 4. Step 1: Demolition and Excavation (Retrofit Scenarios)
- 5. Step 2: Rough-In Plumbing
- 6. Step 3: Selecting and Assembling the Drain
- 7. Step 4: Pouring and Patching the Concrete
- 8. Step 5: Waterproofing and Creating the Pre-Slope
- 9. Special Focus: Installing Linear Drains
- 10. Noahhometech: Bathroom Drainage Experts
- 11. Maintenance and Longevity
- 12. Summary Comparison Table
- 13. Frequently Asked Questions
- 14. References
1. Understanding the Project Scope
Before grabbing a jackhammer, it is crucial to understand the two main scenarios you might face when installing shower drain in concrete floor. The complexity of your project depends largely on whether you are working with a new build or a renovation.
New Construction (Rough-In)
In a new construction scenario, the process is streamlined. You will be placing the drain pipes and the trap before the concrete slab is poured. This allows for precise positioning without the need for destructive demolition. The key challenge here is securing the pipe so it does not shift during the concrete pour and ensuring the vertical stub-out is at the correct height relative to the finished floor.
Retrofit (Existing Slab)
This is the more common and labor-intensive scenario for DIYers and renovators. It involves locating the existing sewer line, cutting a trench in the concrete slab, removing the rubble, digging out the soil, and tying into the main waste line. This process requires heavy-duty tools and careful planning to avoid damaging structural integrity or other utility lines buried in the slab.
2. Essential Tools and Materials
Success in installing shower drain in concrete floor relies heavily on having the right equipment. Attempting this job with inadequate tools will lead to frustration and poor results.
Tools
- Demolition: Jackhammer (electric breaker), sledgehammer, angle grinder with diamond masonry blade, or a concrete saw.
- Excavation: Shovel, mattock, bucket for debris removal.
- Plumbing: Reciprocating saw (Sawzall), PVC cutter, tape measure, torpedo level, marker.
- Concrete Work: Trowel, float, mixing tub or wheelbarrow, hoe.
- Safety Gear: Heavy-duty gloves, safety goggles, ear protection, dust mask (respirator recommended for silica dust).
Materials
- Drain Assembly: Choose from Noahhometech’s range (Linear, Square, or Standard).
- Piping: 2-inch PVC or ABS pipe (depending on local code) and fittings (P-trap, elbows, Y-fittings).
- Adhesives: PVC primer and cement.
- Concrete Mix: Sand mix or high-strength concrete mix for patching.
- Waterproofing: Liquid membrane or sheet membrane (e.g., PVC liner).
- Gravel: Pea gravel for pipe bedding.
3. Planning and Layout
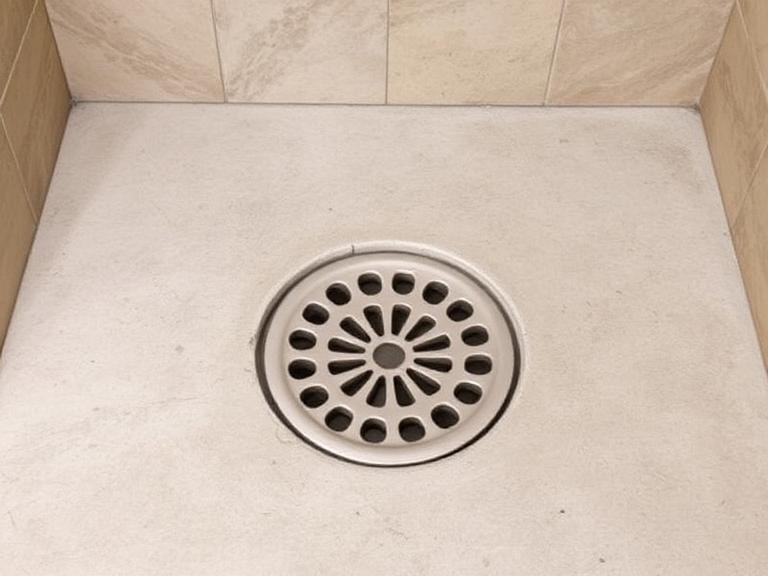
The first physical step in installing shower drain in concrete floor is marking the location. Precision is paramount. If you are installing a center drain, it needs to be exactly in the center of your shower pan area. If you are opting for a modern linear drain, it typically sits against the back wall or at the entrance.
Using a chalk line or marker, draw the footprint of your shower on the concrete floor. Mark the center point for the drain. If you are connecting to an existing line, try to minimize the distance of the new trench to save labor. Remember that shower drains generally require a 2-inch pipe to ensure adequate flow rate, which is larger than the 1.5-inch pipe used for tubs. This often necessitates cutting back to the main stack to upgrade the pipe size.
4. Step 1: Demolition and Excavation (Retrofit Scenarios)
This is the most physically demanding part of installing shower drain in concrete floor. Ensure you have turned off water supplies and located any radiant heating lines or electrical conduits before cutting.
Cutting the Concrete
Use a concrete saw or an angle grinder with a diamond blade to score the concrete along your marked trench lines. Cutting helps prevent the concrete from cracking uncontrollably outside your work area. The trench should be wide enough (approx. 12 inches) to allow you to work on the pipe fittings comfortably.
Breaking and Removing
Use a jackhammer to break up the concrete within your cut lines. Start from the center and work your way out. Remove the concrete chunks and then dig out the dirt underneath to expose the main waste line. You will need to dig deep enough to accommodate the slope of the new pipe (minimum 1/4 inch per foot) and the P-trap.
5. Step 2: Rough-In Plumbing
With the trench open, the plumbing work begins. This is critical for the long-term functionality of your shower.
Installing the P-Trap
Every shower drain requires a P-trap to prevent sewer gases from entering the home. Assemble your P-trap and the connecting pipe run dry (without glue) first to ensure everything fits. The trap arm must flow into the waste line using a sanitary tee or wye fitting.
Venting
A common oversight when installing shower drain in concrete floor is improper venting. Without a vent, water may drain slowly or siphon the trap dry. If the existing vent is too far (usually more than 5-6 feet for a 2-inch trap arm), you may need to install a new vent line that runs up through the wall and connects to the main vent stack.
Slope and Bedding
Ensure the horizontal pipe run has a slope of 1/4 inch per foot towards the sewer line. Support the pipe with pea gravel to prevent it from sagging over time. Once you are satisfied with the dry fit, clean the joints with primer and glue them with PVC cement.
6. Step 3: Selecting and Assembling the Drain
The type of drain you select dictates the next steps. Modern showers often use a bonding flange drain, which is compatible with surface-applied waterproofing membranes. Traditional drains use a clamping ring system for PVC pan liners.
Glue the drain base onto the vertical pipe stub. Ensure the drain base is level. It is highly recommended to tape over the drain opening to prevent debris, concrete, or tools from falling into the plumbing system during the next steps.
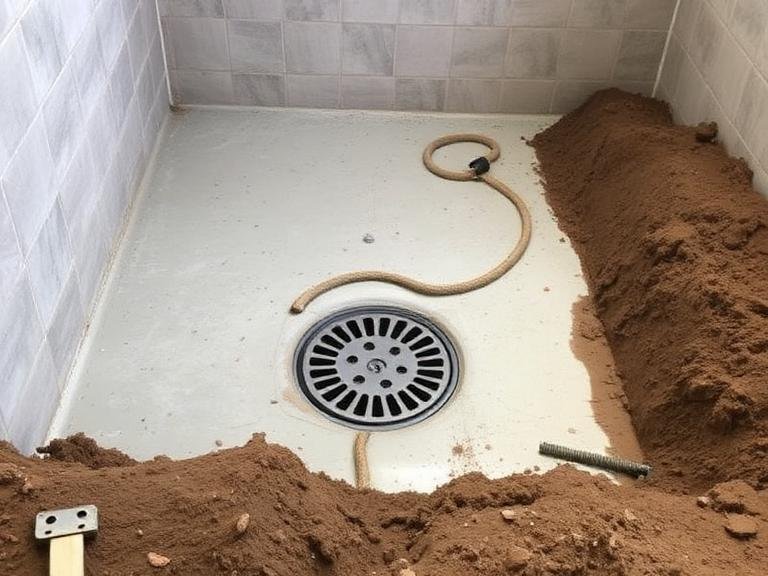
7. Step 4: Pouring and Patching the Concrete
With the plumbing inspected and secured, it is time to close the floor. This step restores the structural integrity of your slab.
Mix your concrete (sand mix is usually preferred for smoother finishing) according to the bag instructions. Shovel the concrete into the trench, working it under the pipe to provide solid support. Fill the trench until it is level with the surrounding slab. Use a trowel to smooth the surface.
Pro Tip: If you are using a bonding flange drain, the concrete should be flush with the top of the flange. If you are creating a recessed shower floor for a curbless entry, you must calculate the depth required for the slope and tile thickness at this stage.
8. Step 5: Waterproofing and Creating the Pre-Slope
Waterproofing is the most critical defense against leaks. A concrete floor is porous and will wick water if not sealed.
The Pre-Slope
Before applying the waterproof liner, you must create a “pre-slope” or “pitch” using a dry-pack mortar mix (deck mud). This layer sits on top of the concrete slab and slopes towards the drain at a rate of 1/4 inch per foot. This ensures that any water that penetrates the tile and grout will flow towards the drain weep holes rather than sitting stagnant.
Applying the Membrane
Once the pre-slope has cured, apply your chosen waterproofing membrane. For liquid membranes, paint it on thick, ensuring coverage up the walls. For sheet membranes, bond them to the floor and the drain flange. If using a Noahhometech drain, ensure the membrane integrates seamlessly with the drain body to create a watertight seal.
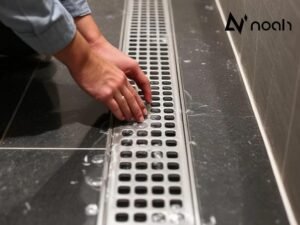
9. Special Focus: Installing Linear Drains
Linear drains are increasingly popular for concrete floor installations because they allow for the use of large-format tiles and single-slope floors.
When installing shower drain in concrete floor using a linear system, the drain is typically placed against a wall. This simplifies the sloping process, as the floor only needs to pitch in one direction (towards the wall) rather than funnelling to a center point. This makes screeding the mortar bed significantly easier for DIYers.
For these installations, use a product like the Linear Wall Shower Drain or Ultra-Thin Type Shower Drain. These units require precise leveling during the concrete patch phase to ensure they sit perfectly flush with the final tile layout. Adjustable feet on these drains help fine-tune the height before the final mortar is poured.
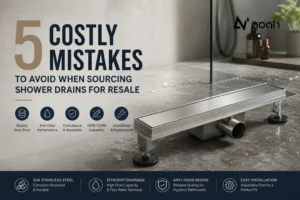
10. Noahhometech: Bathroom Drainage Experts

When it comes to sourcing the hardware for your project, quality matters. Noahhometech stands out as a leading shower drain manufacturer, specializing in high-quality, visually striking drainage solutions for bathrooms, hotels, and commercial spaces. Their complete OEM and ODM services include ultra-thin linear drains, square drains, vertical drains, and fully customized shower systems, made from 304 stainless steel with durable PVD finishes.
With brand customization, rapid prototyping, and globally recognized certifications, Noahhometech helps clients stay competitive and deliver premium end-user experiences. From innovative design to precise installation, their products provide efficient, durable, and modern shower drainage solutions.
Our Products:
- Standard type shower drain: Robust and reliable for traditional layouts.
- Odor-Resistant Type Shower Drain: Features advanced sealing mechanisms to block sewer gases.
- Ultra-Thin Type Shower Drain: Ideal for minimalist designs where floor depth is limited.
- Invisible Shower Drain: Tile-insert designs that vanish into the floor pattern.
- Insert Wall Shower Drain: A sleek solution that moves the drain off the floor entirely.
- Linear Wall Shower Drain: Perfect for large format tiles and curbless showers.
- Strip Vertical Shower Drain: High-flow capacity for luxury multi-head showers.
- Square & Triangular Bathroom Drains: Geometric options to fit specific corner or center layouts.
11. Maintenance and Longevity
Once you have finished installing shower drain in concrete floor, maintenance is key to longevity. Concrete floors are rigid, but settling can occur. Regularly inspect the grout lines around the drain for cracking, which could indicate movement or water intrusion.
For the drains themselves, especially linear and invisible models, regular cleaning is essential. Hair and soap scum can accumulate in the elongated channels. Noahhometech drains typically feature removable grates and hair catchers (strainers) that make this task simple. For Odor-Resistant Type Shower Drains, ensure the sealing mechanism is free of debris to maintain the air seal.
12. Summary Comparison Table
| Step | Difficulty | Estimated Time | Critical Checkpoint |
|---|---|---|---|
| Demolition | High | 4-8 Hours | Avoid cutting utility lines in slab. |
| Plumbing Rough-In | Medium | 2-4 Hours | Ensure 1/4″ per foot slope on pipe. |
| Concrete Patch | Medium | 2 Hours + Cure | Support pipe fully to prevent sagging. |
| Pre-Slope Mortar | Medium | 3 Hours + Cure | Slope must lead water to drain. |
| Waterproofing | Medium | 2-4 Hours | Leak test for 24 hours before tiling. |
| Tiling | High | 1-2 Days | Drain grate must be flush with tile. |
13. Frequently Asked Questions
14. References
1. “Plumbing Code Standards for Shower Receptors,” International Code Council (ICC), 2025.
2. “Tile Council of North America (TCNA) Handbook for Ceramic, Glass, and Stone Tile Installation,” 2024 Edition.