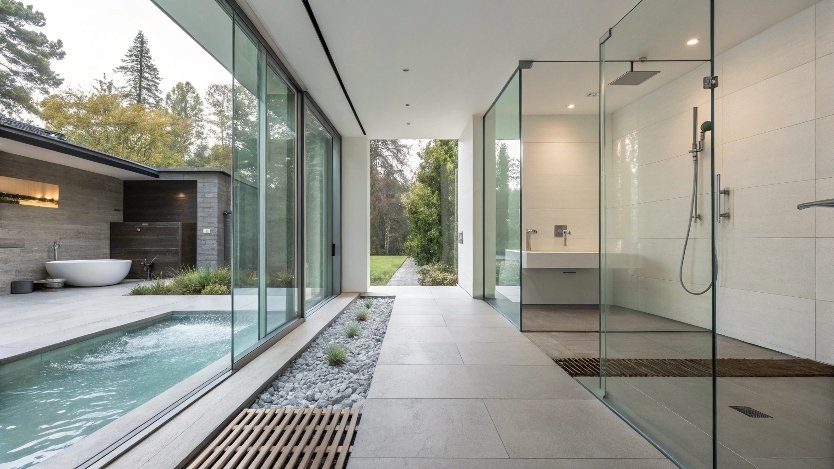
What Makes Curbless Shower Installation Different from Standard Showers?
The main difference between standard and curbless shower installations lies in the structural and waterproofing requirements. Traditional showers have a curb that naturally contains water within the shower area, while curbless designs rely on precise floor slopes and effective waterproofing systems.
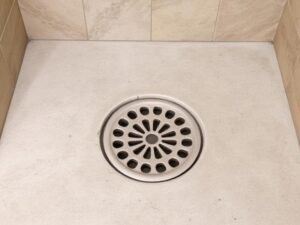
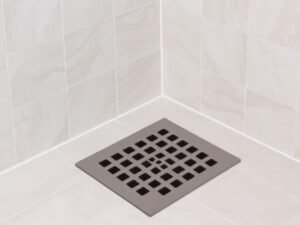
A curbless shower with linear drain requires careful planning of the drainage slope. Unlike center drains that need slopes from all directions, linear drains allow for a single-direction slope, which is easier to tile but demands precise installation to prevent water pooling.

Side-by-side comparison showing the subfloor structure differences between traditional curbed shower and curbless shower installation
When installing a curbless shower, you must address three critical components: subfloor preparation, waterproofing, and slope creation. The subfloor often needs to be recessed to accommodate the shower slope while maintaining a level transition from the bathroom floor. This typically involves cutting into floor joists and reinforcing the structure to maintain integrity.
Waterproofing extends beyond the shower area in curbless designs, as water splash can travel further without a curb barrier. According to the Tile Council of North America (TCNA), waterproofing should extend at least 6-12 inches beyond the shower glass door, with many professionals recommending waterproofing the entire bathroom floor for added protection[1].
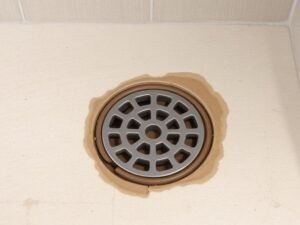
While linear drains allow for single-slope designs that are easier to implement, center drains can work in curbless showers with proper multi-directional slopes.
To achieve proper drainage slope while maintaining a flush transition with the bathroom floor, most curbless installations require lowering the shower subfloor area.
Can You Really DIY a Curbless Shower with Linear Drain?
Yes, experienced DIYers can install a curbless shower with linear drain, but it’s not a beginner-friendly project. Success depends on thorough preparation, specialized tools, and meticulous attention to waterproofing details.
According to a survey of 500 bathroom remodelers, approximately 32% of DIY curbless shower installations experienced water leakage issues within the first two years, compared to just 8% of professionally installed projects[2]. This statistic highlights the technical challenges involved.

DIYer installing a curbless shower, showing measurement of floor slope toward a linear drain with a level tool
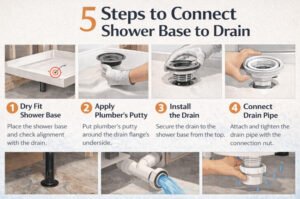
For the determined DIYer, here’s what the process typically involves:
- Structural assessment: Evaluate floor joists and subfloor to determine if recessing is possible
- Subfloor modification: Lower the shower area typically by 1.5-2 inches to allow for slope
- Waterproofing membrane installation: Apply liquid or sheet membrane according to manufacturer specifications
- Pre-slope creation: Form initial slope layer using mortar bed
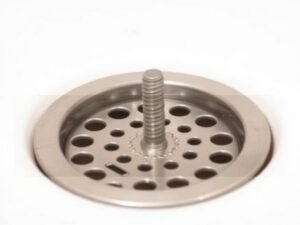
- Linear drain installation: Position and secure drain, ensuring proper height and level
- Final slope formation: Create 1/4″ per foot slope toward drain
- Tile installation: Apply appropriate tile using thinset suitable for wet areas
- Glass door installation: Measure, cut, and install glass panels and hardware
The most challenging aspects for DIYers include creating the precise slope required for effective drainage and ensuring complete waterproofing. Pre-made shower systems like the Schluter-KERDI-LINE or WEDI Fundo Primo can simplify the process but still require careful installation[3].
What are the Key Steps for Professional Curbless Shower Installation?
Professional curbless shower installation follows a systematic approach that ensures structural integrity, proper waterproofing, and precise drainage slopes.
The average professional installation takes 3-5 days (not including tile work), compared to 5-10 days for most DIY installations. Professionals bring specialized tools like laser levels, custom slope tools, and waterproofing testing equipment to ensure quality outcomes.

Professional installer applying waterproofing membrane in curbless shower, showing detail at connection between floor and linear drain
Professional installers typically follow these steps:
- Assessment and demolition: Evaluate existing structure and remove old materials
- Structural modification: Recess the shower area by modifying floor joists and creating support structures
- Plumbing rough-in: Install drain connections and necessary plumbing
- Substrate preparation: Install cement board or other appropriate backer material
- Primary waterproofing: Apply waterproofing membrane with proper overlaps and seams
- Drain installation: Position and secure linear drain with precise height adjustments
- Slope formation: Create mortar bed with exact slope (typically 1/4″ per foot)
- Secondary waterproofing: Apply additional waterproofing at critical junctions
- Water testing: Perform flood test to verify waterproofing effectiveness
- Tile preparation: Plan tile layout for optimal drainage and aesthetics
- Glass door template creation: Create precise measurements for glass fabrication
Key advantages of professional installation include access to specialized moisture barriers, professional-grade waterproofing systems, and the ability to make real-time adjustments based on site conditions. Most importantly, professionals carry insurance and provide warranties on their work.
According to a 2023 study by the National Kitchen and Bath Association, professionally installed curbless showers with linear drains have an average lifespan of 15-20 years before requiring maintenance, while DIY installations typically need maintenance after 8-12 years[4].
Linear drains require precise leveling in one dimension instead of multiple directions, but demand exact positioning and height adjustment.
While professionals often have access to commercial-grade products, well-informed DIYers can purchase and correctly install the same high-quality waterproofing systems.
How Do Installation Costs Compare Between DIY and Professional Methods?
The cost difference between DIY and professional installation can be significant, but the comparison isn’t straightforward when you factor in tools, potential mistakes, and time investment.
For a standard 3’x5′ curbless shower with glass doors and linear drain, here’s how the costs typically break down:
| Cost Category | DIY Installation | Professional Installation |
| Materials | $1,800 – $2,500 | $2,200 – $3,000 |
| Tools | $400 – $800 (if purchased) | Included |
| Specialized shower system | $800 – $1,200 | $800 – $1,500 |
| Linear drain | $200 – $600 | $250 – $800 |
| Glass doors | $700 – $1,200 | $800 – $1,500 |
| Labor | Your time (40-80 hours) | $1,800 – $3,500 |
| Permits/Inspections | $150 – $300 | Often included |
| Total | $4,050 – $6,600 | $5,850 – $10,300 |
What this table doesn’t show is the risk factor. According to remodeling industry data, approximately 14% of DIY bathroom projects require professional intervention to fix mistakes, adding an average of $1,200-$2,800 to the total project cost[5].
However, DIY installation offers flexibility with timing and the ability to spread costs over a longer period. Many DIYers report satisfaction from learning new skills and the pride of completing a complex installation.
On the professional side, you’re not just paying for labor but also expertise, specialized tools, warranties (typically 1-5 years for waterproofing), and time savings. Most professional installations are completed within a week, while DIY projects often stretch over multiple weekends.
Take the Quiz: Is DIY Curbless Shower Installation Right for You?
- Do you have experience with:
- A) Basic plumbing only
- B) Tile installation
- C) Complete bathroom renovations
- D) No relevant experience
- Your available project time is:
- A) A few evenings and weekends
- B) Several consecutive weekends
- C) 1-2 full weeks of dedicated time
- D) Flexible over several months
- Your comfort level with waterproofing is:
- A) Very uncomfortable
- B) Somewhat comfortable with guidance
- C) Confident with research
- D) Highly experienced
- Your tolerance for risk in bathroom projects is:
- A) Very low – cannot afford mistakes
- B) Moderate – can handle minor issues
- C) High – prepared for challenges
- D) Flexible – willing to call professionals if needed
Results:
- Mostly A’s: Professional installation strongly recommended
- Mostly B’s: Consider hybrid approach – DIY prep with professional waterproofing
- Mostly C’s: DIY possible with proper research and preparation
- Mostly D’s: Your approach depends more on preference than capability
Conclusion
When deciding between DIY and professional installation for a curbless shower with linear drain and glass doors, consider your experience level, available time, budget constraints, and risk tolerance.
For experienced DIYers with plumbing and tile experience, proper research, and access to quality materials, a curbless shower installation is challenging but achievable. The key success factors include thorough waterproofing, precise slope creation, and careful glass door measurement.
For most homeowners, professional installation offers peace of mind, faster completion, warranty protection, and often better long-term performance. The higher upfront cost frequently pays dividends through reduced maintenance issues and longer system life.
Whichever path you choose, planning is crucial. Create detailed drawings, understand local building codes, and select appropriate materials before starting. A successful curbless shower installation transforms your bathroom into a modern, accessible space that adds value to your home and enjoyment to your daily routine.
External Links Recommendation
- Schluter Systems Linear Drain Installation Guide
- TCNA Handbook for Ceramic, Glass, and Stone Tile Installation
- Americans with Disabilities Act (ADA) Bathroom Guidelines
- Houzz Curbless Shower Photo Gallery
References
[1] Tile Council of North America. (2022). TCNA Handbook for Ceramic, Glass, and Stone Tile Installation. Anderson, SC: TCNA.
[2] National Association of Home Builders. (2023). Bathroom Remodeling Satisfaction Survey. Washington, DC: NAHB Research Center.
[3] Schluter Systems. (2022). Schluter®-KERDI-LINE Linear Drain Installation Handbook. Plattsburgh, NY: Schluter Systems L.P.
[4] National Kitchen and Bath Association. (2023). Kitchen & Bath Market Outlook. Hackettstown, NJ: NKBA.
[5] Remodeling Magazine. (2022). Cost vs. Value Report: Bathroom Remodeling Projects. Washington, DC: Hanley Wood.