Table of Contents
- How to Replace or Install a Preformed Shower Drain
- Introduction
- Professional Shower Drain Manufacturer in China
- Tools and Materials Needed
- Step-by-Step: Removing the Old Shower Drain
- Step-by-Step: Installing a Preformed Shower Drain
- Sealing & Leak Testing
- Customization Options
- Pro Tips for Long-Lasting Performance
- Common Mistakes to Avoid
- Maintenance & Cleaning
- Summary Table
- Reference Links
How to Replace or Install a Preformed Shower Drain
Introduction
A properly installed shower drain keeps moisture inside the shower assembly and out of your subfloor, preventing mold, odors, and structural damage. Whether your existing drain is corroded, leaking, or out-of-style, replacing it with a preformed shower drain is a high-ROI upgrade most skilled DIYers can tackle in an afternoon.
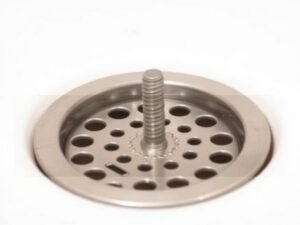
- Know the parts: flange, strainer, locking ring, gasket, and trap connection.
- Choose the right sealant: plumber’s putty (for certain metals) or 100% silicone (universal & modern pans).
- Always perform a leak test before finishing.
Professional Shower Drain Manufacturer in China
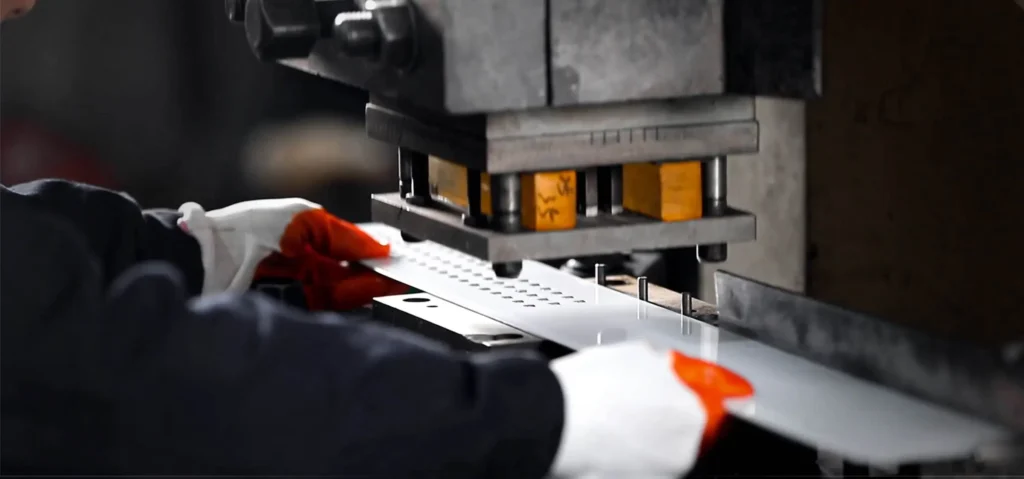
Noahhometech is a professional bathroom products manufacturing factory in China, established in 2014. Our customers are primarily in Europe and America, and our annual floor drain export volume ranks top 3 in the European market. We also cooperate with Castorama to develop linear floor drains.
- Certifications: CUPC File Number: 13340, CE certificate.
- Quality Proof: Spray paint salt spray test report & BAG test report available.
- Latest Equipment: Salt Spray Test, Punching Machinery, Polishing, and more.
Customize Content
- Print the Logo
- Packaging Design
- Customized Colors
- Panels Design
Tools and Materials Needed
- Preformed shower drain kit (compatible with your pan material & pipe type)
- Adjustable wrench and/or drain removal tool
- Screwdrivers (Phillips/flat)
- Plumber’s putty or 100% silicone sealant
- Pipe wrench / channel-lock pliers
- PTFE tape (if threaded connections apply)
- Utility knife, scraper, and rags
- Bucket & sponge for cleanup
- Flashlight for under-pan inspection
- Safety gear: gloves and eye protection
Pro tip: Verify your waste line (PVC/ABS/metal) and trap position before purchasing your drain to ensure perfect compatibility.
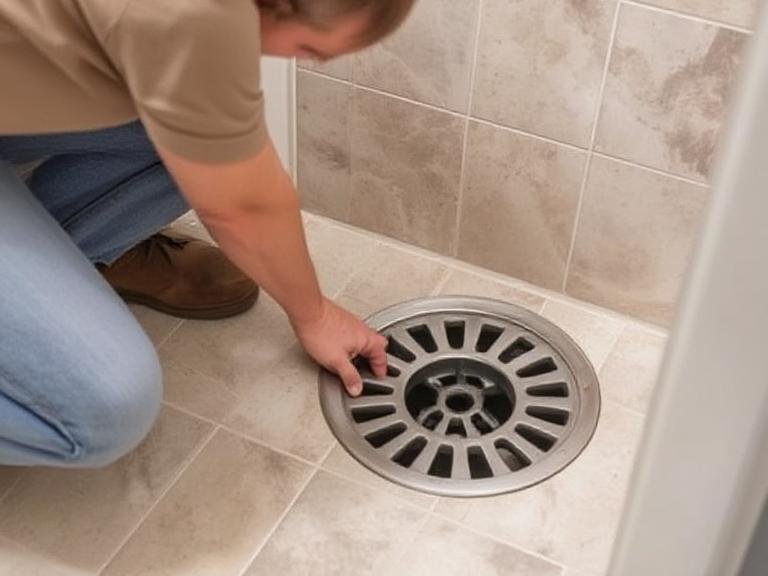
Step-by-Step: Removing the Old Shower Drain
1) Protect the Work Area
- Cover the pan with a towel to avoid scratches.
- Place a rag in the drain opening to prevent dropped screws from disappearing.
2) Remove the Drain Cover/Strainer
- Unscrew visible fasteners or gently pry a snap-in cover.
- Remove any hair catchers or trim rings.
3) Loosen the Drain Body
- Use a drain key or adjustable pliers to unthread the drain body from the flange.
- If there’s a locking nut beneath the pan, access from below and loosen it.
4) Clean and Inspect
- Scrape away old putty/silicone until the surface is smooth, dry, and debris-free.
- Inspect the pan around the opening for cracks or flex; repair or reinforce if necessary.
Common issue: Stuck or corroded drains. Apply penetrating oil and give it time. For severe corrosion, a specialty drain removal tool may be required.
Step-by-Step: Installing a Preformed Shower Drain
1) Dry Fit Components
- Place the new drain into the opening to confirm fit and flange sit.
- Check alignment to the waste pipe/trap before sealing.
2) Apply Sealant
- Plumber’s putty: Roll into a rope and place under the metal flange (avoid on certain plastics—check manufacturer guidance).
- 100% silicone: Apply an even bead under the flange for universal compatibility and modern plastic pans.
3) Seat the Drain & Secure
- Press the drain firmly into place so sealant uniformly compresses.
- From below, install the gasket and locking nut. Hand-tighten, then snug with a wrench—do not overtighten.
4) Connect to the Waste Pipe
- For PVC/ABS: use the correct solvent cement and primer as specified.
- For threaded connections: wrap threads with PTFE tape and tighten to a firm seal.
5) Install the Strainer
- Set the strainer height flush with the pan for smooth water flow.
- Screw or snap in according to your kit’s design.
Fit check: The strainer should be level and free of gaps. Realign before sealant cures if needed.
Sealing & Leak Testing
- Wipe excess sealant: Clean squeeze-out before it skins over.
- Flood test: Temporarily plug the drain and fill the pan with 1–2″ of water. Wait 20–30 minutes and inspect below for drips.
- Final check: Remove the plug and observe flow; confirm no seepage at joints.
Pass criteria: No dampness on the underside, no bubbles/weeping at the flange, and steady drainage without back-up.
Customization Options
To align function with styling, consider custom finishes and branding—especially for premium or multi-unit projects.
- Logo printing on strainers or trim plates
- Packaging design for retail or hospitality projects
- Customized colors to match fixtures or tiles
- Panels design for linear/architectural drains
Pro Tips for Long-Lasting Performance
- Match materials: Use the sealant recommended for your pan and drain metals/plastics.
- Mind the torque: Overtightening can crack acrylic or fiberglass pans.
- Choose linear drains in low-slope, large-format tile showers for improved flow and aesthetics.
- Add a hair catcher to reduce clogs and maintain flow rates.
- Annual inspection: Check for slow seepage or movement; re-caulk if needed.
Common Mistakes to Avoid
- Skipping surface prep: Sealant won’t bond well to soap scum or old putty.
- Wrong sealant choice: Some putties stain natural stone; silicone is safer around porous materials.
- No flood test: Small leaks often appear only under hydrostatic conditions.
- Misaligned strainer height: Can create standing water and premature finish wear.
Maintenance & Cleaning
- Weekly: Remove hair and wipe strainer to prevent buildup.
- Monthly: Flush with hot water to clear soap residues.
- Quarterly: Inspect silicone joints; re-seal any cracks or pinholes.
- Avoid harsh chemicals: Use pH-neutral cleaners to preserve finishes and gaskets.
Tip: If you notice sulfur or sewer odors, verify the trap retains water and check the strainer gasket.
Summary Table
| Key Point | Takeaway |
|---|---|
| Preparation | Gather proper tools; confirm drain & pipe compatibility; protect the pan. |
| Removal | Remove strainer, unthread body/locking nut, clean to bare, dry surface. |
| Installation | Apply correct sealant, seat drain, secure gasket & nut without overtightening. |
| Leak Testing | Perform a flood test; inspect above/below for drips or weeping joints. |
| Customization | Logo, packaging, colors, and panel designs elevate brand & aesthetics. |
| Maintenance | Weekly debris removal, periodic flushing, and timely re-sealing extend service life. |
Reference Links