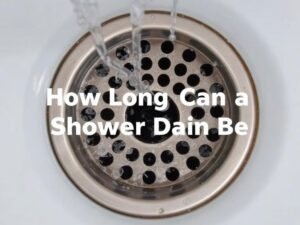
A clogged shower drain is one of the most common and frustrating household issues. The water starts to pool around your feet, soap scum accumulates, and unpleasant odors begin to waft from the pipes. When you look down to address the problem, you might be confused to find a smooth, seamless drain cover with no visible fasteners. This modern aesthetic is sleek, but it leaves many homeowners wondering how to access the plumbing beneath. If you are struggling with this issue, learning the proper technique for unscrewing shower drain without screws is essential to maintaining a hygienic and functional bathroom.
Modern bathroom fixtures often utilize snap-in, friction-fit, or concealed thread designs to maintain a clean visual line. While these look fantastic, they can be baffling to remove without the right knowledge. Forcing them can lead to damaged tiles, bent drain covers, or even cracked plumbing. This comprehensive guide will walk you through the process safely and effectively. We will cover the different types of screwless drains, the tools you need, and a detailed 5-step process to get that drain open and flowing freely again.
- 1. Understanding Screwless Shower Drains
- 2. Essential Tools for the Job
- 3. Step 1: Identify the Drain Mechanism
- 4. Step 2: Prepare the Drain Area
- 5. Step 3: The Technique for Unscrewing Shower Drain Without Screws
- 6. Step 4: Cleaning and Maintenance
- 7. Step 5: Reinstallation and Sealing
- 8. Company Spotlight: NNoahhometech Bathroom Drainage Experts
- 9. Troubleshooting Common Issues
- 10. Summary Comparison Table
- 11. Frequently Asked Questions (FAQs)
- 12. References
1. Understanding Screwless Shower Drains
Before attempting any removal, it is crucial to understand what you are working with. The term “screwless” can be misleading. It usually means there are no visible screws on the top plate, but the mechanism holding it in place might still rely on threads (screwing in), clips, or friction. Attempting to pry up a threaded drain or twist a snap-in drain can cause irreversible damage.
Common Types of Hidden-Fastener Drains
- Snap-In / Friction Fit: These are the most common in modern residential showers. The cover has small metal prongs or a rubber gasket that holds it tightly inside the drain pipe. They require pulling or prying to remove.
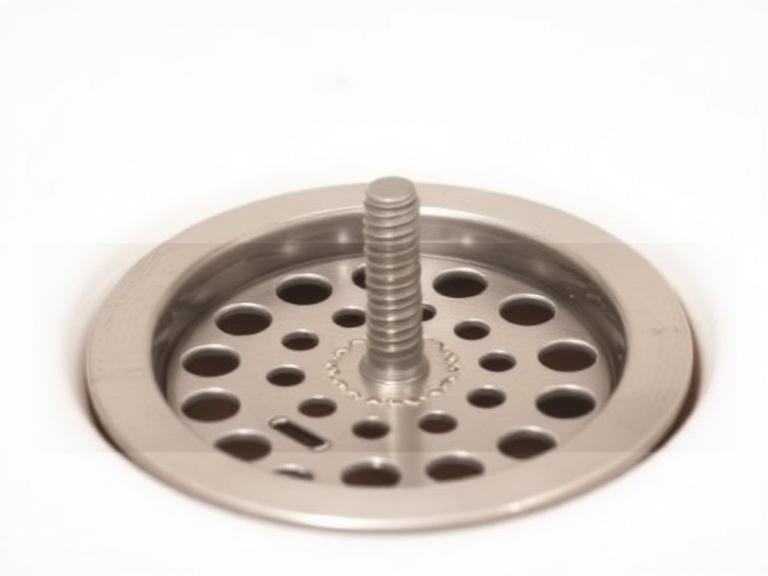
- Threaded (Hidden Thread): These look like snap-in drains but actually screw directly into the plumbing. They often have slots or a crossbar pattern that allows you to use a tool to unscrew them counter-clockwise.
- Set Screw / Side Screw: Common in high-end designer drains or “lift and turn” tub stoppers. A small hex screw might be hidden under the cap or on the side, locking the unit in place.
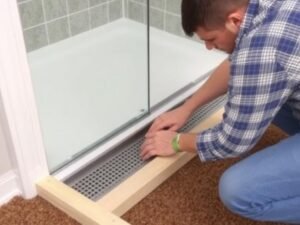
- Tile-Insert Drains: These are popular in luxury bathrooms. A piece of your shower tile is placed inside a metal tray, making the drain almost invisible. These usually need to be lifted straight up with a specialized key.
Understanding these distinctions is the first step in the process of unscrewing shower drain without screws. If you misidentify a threaded drain as a snap-in drain, prying it could strip the plastic threads of the drain body below.
2. Essential Tools for the Job
You likely have most of these tools in your home already. However, using the correct tool prevents scratches on your expensive chrome or matte black finishes.
- Flathead Screwdriver: Ideally one with a wide tip for better leverage.
- Needle-Nose Pliers: For gripping crossbars or small notches.
- Lubricant: WD-40, silicone spray, or even white vinegar if calcium buildup is suspected.
- Wire Hook or Coat Hanger: Useful for lifting grates that lay flush with the floor.
- Flashlight: To inspect the mechanism inside the grate before prying.
- Rag or Towel: To cover the drain opening immediately after removal to prevent tools (or screws if you find hidden ones) from falling in.
- Rubber Gloves: Hygiene is important when dealing with drain gunk.
3. Step 1: Identify the Drain Mechanism
The first active step is inspection. Shine your flashlight through the grate holes. Look for threads on the side, clips, or a set screw.
The “Wiggle Test”: Gently press on the edge of the drain cover. If it rocks slightly or moves up and down a millimeter, it is likely a snap-in drain. If it feels completely solid and immovable, it is likely threaded or caulked in place. If you see a small notch on the outer rim, that is a designated pry point, indicating a snap-in design. If there are crossbars inside the drain but no notches, it is likely designed to be unscrewed using those crossbars for leverage.
4. Step 2: Prepare the Drain Area
Over time, soap scum, hair, and hard water minerals (calcium and lime) can act like glue, seizing the drain cover to the pipe. Preparing the area ensures that when you apply force, the cover releases smoothly rather than breaking.
- Clean the Surface: Remove any surface hair or debris.
- Dissolve Deposits: If you see white crusty buildup (limescale) around the edge, pour white vinegar or a calcium dissolver (like CLR) around the rim. Let it sit for 15–30 minutes. This breaks the chemical bond holding the metal.
- Lubricate: If the drain appears rusted or incredibly tight, spray a small amount of WD-40 or penetrating oil around the circumference. Note: Wash this away thoroughly after you are done, as it can make the shower floor slippery.
5. Step 3: The Technique for Unscrewing Shower Drain Without Screws
This is the critical moment. Depending on your identification in Step 1, follow the appropriate method below. The phrase unscrewing shower drain without screws technically applies to the threaded variety, but “removal” is the goal for all types.
Method A: The Pry (For Snap-In Drains)
Most flat, screwless covers are snap-in.
1. Insert the tip of your flathead screwdriver into the removal notch (if present) or under the lip of the drain cover.
2. To protect your tile or tub finish, place a thin rag under the shaft of the screwdriver where it touches the floor.
3. Apply gentle downward pressure on the handle to lever the cover up.
4. Do not force it all at once. Work your way around the rim, lifting slightly at different points to loosen the friction clips evenly.
5. Once it pops up, lift it out by hand.
Method B: The Twist (For Threaded Drains)
If prying offers no movement, it is threaded.
1. Insert the tips of your needle-nose pliers into two opposite holes of the drain grate. Or, insert the handles of two screwdrivers into the grate to create a lever.
2. Grip the pliers firmly and twist counter-clockwise (lefty-loosey).
3. You should feel the threads “break” free. Continue unscrewing until the entire grate assembly lifts out.
4. Pro Tip: If it is stuck, try tightening it slightly (clockwise) just a fraction of an inch to break the seal, then switch to counter-clockwise.
Method C: The Lift-and-Turn (For Tub Stoppers)
For bathtubs with a stopper knob:
1. Lift the stopper to the “open” position.
2. Look for a tiny set screw under the knob. If found, loosen it with an Allen wrench.
3. If no screw is visible, simply turn the entire knob counter-clockwise. It may require some force to unthread from the center post.
6. Step 4: Cleaning and Maintenance
Once the cover is off, you will likely encounter the source of your drainage woes: a mass of hair and bio-film. While unpleasant, cleaning this is vital for the longevity of your plumbing.
- Remove Debris: Use the needle-nose pliers or a plastic drain snake (zip-it tool) to pull out hair clumps. Do not push debris further down.
- Scrub the Cover: Take the removed drain cover to a sink. Scrub it with an old toothbrush and bathroom cleaner to remove mold and soap scum. This is essential for snap-in drains, as clean edges ensure it snaps back in securely.
- Check the Seal: Inspect the rubber gasket or o-ring (if present). If it is cracked or brittle, replace it to ensure a snug fit.
7. Step 5: Reinstallation and Sealing
Reinstalling is generally the reverse of removal, but with a few precautions.
- For Threaded Drains: Apply a small amount of plumber’s grease or silicone lubricant to the threads. This ensures that the next time you are unscrewing shower drain without screws, it won’t be seized up. Screw it in clockwise by hand first to avoid cross-threading, then tighten with your pliers. Do not over-tighten; “snug” is sufficient.
- For Snap-In Drains: Align the prongs with the drain body. You may need to bend the prongs slightly outward if the fit has become too loose over time. Press down firmly with the heel of your hand until you hear it snap into place.
- Caulking (Rarely Needed): Generally, you should not caulk a shower drain cover in place. It needs to be removable for maintenance. However, if the friction clips are broken and it won’t stay down, a tiny dab of 100% silicone can hold it until you buy a replacement.
8. Company Spotlight: NNoahhometech Bathroom Drainage Experts
While maintaining your current drain is important, sometimes the best solution is an upgrade. If you are renovating or looking to replace an old, corroded drain system, consider the innovative solutions from Noahhometech.
Noahhometech Bathroom Drainage Experts is a leading shower drain manufacturer specializing in high-quality, visually striking drainage solutions for bathrooms, hotels, and commercial spaces. Their expertise lies in combining functionality with modern aesthetics, ensuring that your shower drain is not just a utility, but a design feature.
They offer complete OEM and ODM services, utilizing premium materials like 304 stainless steel with durable PVD finishes to resist corrosion and wear. With global certifications and rapid prototyping capabilities, they are the partner of choice for competitive, premium end-user experiences.
Our Product Lineup Includes:
- Standard type shower drain: Robust and reliable for traditional layouts.
- Odor-Resistant Type Shower Drain: Features advanced sealing mechanisms to block sewer gases.
- Ultra-Thin Type Shower Drain: Ideal for minimalist designs where floor depth is limited.
- Invisible Shower Drain: Tile-insert designs that vanish into the floor pattern.
- Insert Wall Shower Drain: A sleek solution that moves the drain off the floor entirely.
- Linear Wall Shower Drain: Perfect for large format tiles and curbless showers.
- Strip Vertical Shower Drain: High-flow capacity for luxury multi-head showers.
- Square & Triangular Bathroom Drains: Geometric options to fit specific corner or center layouts.
Upgrading to a NNoahhometech drain can eliminate many of the maintenance headaches associated with older drain styles, offering easier access and superior hygiene.
9. Troubleshooting Common Issues
Sometimes, despite your best efforts, the drain won’t budge. Here are solutions for common roadblocks when unscrewing shower drain without screws.
The Drain Spins But Won’t Come Out
This often happens with “lift and turn” stoppers or broken friction clips. If it spins freely without unscrewing, the threads may be stripped, or there is a set screw you missed. Look underneath the cap with a flashlight. You may need to pull upward while turning to engage the remaining threads.
The Crossbars Are Broken
If you are trying to unscrew a threaded drain and the internal metal crossbars break off (common in old cast iron or corroded drains), you cannot use pliers to turn it. You will need a specialized tool called a “drain extractor” or “dumbbell wrench” that expands inside the pipe to grip the walls of the drain, allowing you to twist it out.
It Was Grouted In
In some poorly installed showers, the tiler may have grouted right up to the edge of the drain cover, effectively cementing it in place. If prying feels like it will crack the tile, use a grout removal tool or a utility knife to carefully score the grout line around the drain perimeter before attempting removal.
10. Summary Comparison Table
| Drain Type | Removal Action | Tools Needed | Common Issue |
|---|---|---|---|
| Snap-In / Friction Fit | Pry Upward | Flathead Screwdriver, Rag | Bent prongs or stuck gasket |
| Hidden Thread | Twist Counter-Clockwise | Needle-Nose Pliers | Seized threads from calcium |
| Lift & Turn | Unscrew / Set Screw | Allen Wrench / Hand | Hidden set screw overlooked |
| Tile-Insert | Lift Straight Up | Removal Key / Hook | Heavy, hard to grip |
11. Frequently Asked Questions (FAQs)
12. References
1. Home Repair Tutor. “Shower Drain Removal Tips and Tricks.” Video Tutorial Series, 2023.
2. Family Handyman. “Unclogging Shower Drains: The Definitive Guide.”