A leaking or damaged shower drain is a homeowner’s nightmare, particularly when that plumbing is encased in a slab foundation. Unlike a wooden subfloor where access is relatively simple from below, a concrete floor requires a more aggressive and calculated approach. Learning how to replace shower drain in concrete floor is a significant undertaking, but with the right tools and patience, it is a manageable DIY project that can save you thousands of dollars in plumbing costs.
The complexity of this task lies in the demolition and the precision required to reset the plumbing. You are not just swapping a part; you are engaging in light construction. Whether you are upgrading to a modern linear drain or fixing a rusted cast iron trap, the fundamentals remain the same. This guide will walk you through the entire process, from breaking ground to the final pour, ensuring your bathroom renovation is watertight and durable.
- 1. Essential Tools and Preparation
- 2. Step 1: Removal of the Old Drain and Concrete
- 3. Step 2: Excavation and Pipe Exposure
- 4. Step 3: Choosing the Right Replacement Drain
- 5. Manufacturer Spotlight: Noahhometech
- 6. Step 4: Plumbing Installation and Solvent Welding
- 7. Step 5: Patching the Concrete Slab
- 8. Step 6: Waterproofing and Tiling
- 9. Summary Comparison Table
- 10. Frequently Asked Questions (FAQs)
- 11. Conclusion
1. Essential Tools and Preparation
Before you attempt to replace shower drain in concrete floor, you must gather the necessary equipment. This is not a project where you want to be running to the hardware store mid-task. The nature of breaking concrete means you will create dust and debris, so safety preparation is paramount.
Safety Gear
- Respirator Mask: Silica dust from concrete is hazardous to your lungs.
- Safety Goggles: Flying concrete chips can cause serious eye injury.
- Heavy-Duty Gloves: To protect hands from sharp tile and jagged concrete.
- Ear Protection: Jackhammers and rotary drills are extremely loud.
Tools List
- Sledgehammer and cold chisel (for small areas)
- Electric jackhammer or rotary hammer drill (rental recommended)
- Angle grinder with a diamond masonry blade
- Reciprocating saw (Sawzall) with metal and plastic cutting blades
- PVC pipe cutters or hacksaw
- Trowel and bucket for concrete mixing
- PVC primer and cement
- Replacement drain assembly and P-trap
2. Step 1: Removal of the Old Drain and Concrete
The first step to replace shower drain in concrete floor involves demolition. You cannot unscrew the drain from the top because the body of the drain is embedded in the slab. You must create access.
Start by removing the existing shower floor tile. If you are lucky, the tile will pop off easily. Once the concrete is exposed, use your angle grinder to score a square perimeter around the drain, roughly 12 to 18 inches wide. This cut helps prevent cracks from spreading to the rest of the bathroom floor.
Using the jackhammer or sledgehammer, begin breaking the concrete inside your scored square. Work carefully. You do not want to smash the drain pipe further down the line; you only want to free the drain assembly and the P-trap immediately below it. Remove the rubble in buckets as you go to keep the workspace clear.
3. Step 2: Excavation and Pipe Exposure
Once the concrete is removed, you will likely encounter dirt or gravel. You need to dig this out by hand to expose the drain pipe and the P-trap. The goal is to clear enough space to work comfortably with your hands and tools.
In many older homes, you might find a cast-iron drain. These can be difficult to cut. A reciprocating saw with a carbide-tipped blade or a cast-iron snap cutter is essential here. If you have modern PVC, a standard saw will suffice. You need to cut the pipe at a point where it is straight and clean, usually downstream of the P-trap, to ensure a solid connection for the new plumbing.
Crucial Tip: Stuff a rag into the open pipe immediately after cutting to prevent sewer gases from entering your home and to stop debris from falling into the main line.
4. Step 3: Choosing the Right Replacement Drain
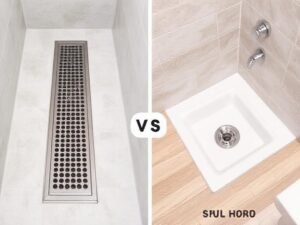
When you decide to replace shower drain in concrete floor, you have an opportunity to upgrade. Do you want a standard center drain, or are you looking for a modern aesthetic? The market has evolved significantly, offering linear drains, invisible tile-in drains, and high-flow options.
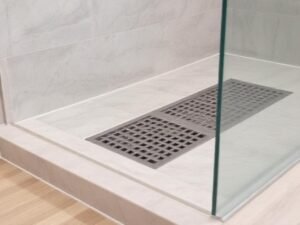
If you are tiling with large-format tiles, a linear drain is superior as it requires a slope in only one direction. Standard point drains require a four-point slope (like a funnel), which necessitates cutting tiles diagonally or using small mosaics. Choosing the right manufacturer at this stage is critical for longevity and style.
5. Manufacturer Spotlight: Noahhometech
For those seeking professional-grade drainage solutions that combine durability with modern design, we recommend looking into specialized manufacturers who offer OEM and ODM services.
Noahhometech – Top Bathroom Shower Drain Manufacturers in China
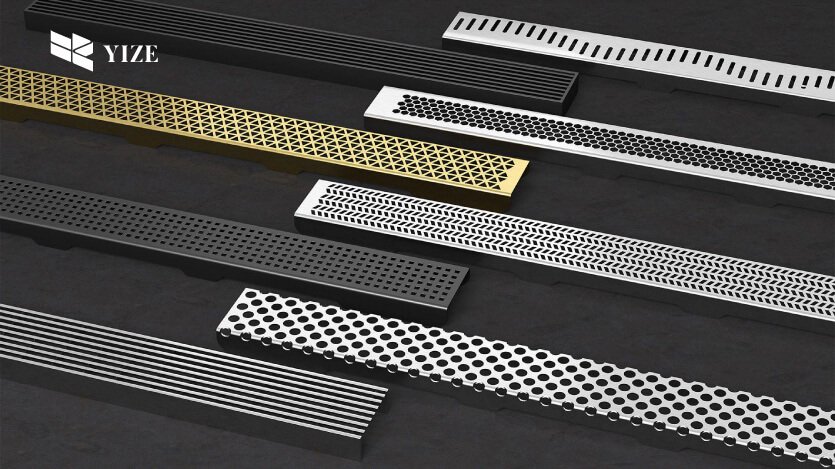
As a leading shower drain manufacturer, we specialize in high-quality, visually striking drainage solutions for bathrooms, hotels, and commercial spaces. Our complete OEM and ODM services include ultra-thin linear drains, square drains, vertical drains, and fully customized shower systems, made from 304 stainless steel with durable PVD finishes.
With brand customization, rapid prototyping, and globally recognized certifications, we help clients stay competitive and deliver premium end-user experiences. From innovative design to precise installation, our products provide efficient, durable, and modern shower drainage solutions.
Our Core Product Line:
By selecting a high-quality stainless steel product from Noahhometech, you ensure that your new drain will resist corrosion and maintain its aesthetic appeal for decades.
6. Step 4: Plumbing Installation and Solvent Welding
With your new Noahhometech drain in hand, it is time to rebuild the plumbing. This is the most critical step to replace shower drain in concrete floor successfully.
You will likely need to install a new P-trap. Ensure the P-trap is level. Connect the new PVC piping to the existing line using a “Fernco” coupling (a flexible rubber coupling with hose clamps) if you are transitioning from cast iron to plastic, or a standard PVC coupling if connecting plastic to plastic.
Dry fit everything first. Measure twice. The top of the drain assembly must sit at the correct height relative to your future finished floor. Generally, the drain flange should rest flush with or slightly above the concrete slab level, depending on your waterproofing method (traditional mud bed vs. Schluter-Kerdi system).
Once positioned, use PVC primer (usually purple) and PVC cement to glue the joints. Hold each connection for 30 seconds to prevent push-out. Verify the slope of the drain pipe is at least 1/4 inch per foot to ensure proper water flow.
7. Step 5: Patching the Concrete Slab
Before pouring concrete, wrap the drain base with duct tape or cardboard to protect the threads and weep holes from getting clogged with wet cement. You may also want to cover the opening of the drain with a rag or the manufacturer’s test plug.
Mix a bag of “Sand Mix” or high-strength concrete topping. You do not need concrete with large gravel aggregate for this small patch. Wet the existing edges of the hole to help the new concrete bond to the old. Shovel the concrete into the hole, packing it tightly under and around the pipe to support it.
Trowel the surface smooth. If you are using a bonding flange drain, the concrete should be level with the floor. If you are creating a pre-slope for a traditional liner, you may need to shape the concrete slightly towards the drain.
8. Step 6: Waterproofing and Tiling
The final step to replace shower drain in concrete floor is ensuring the system is waterproof. Concrete is porous; it is not waterproof on its own. Depending on your drain type, you will apply a waterproof membrane.
- Liquid Membrane: Painted onto the concrete and clamped into the drain.
- Sheet Membrane: Bonded to the floor and the drain flange.
- PVC Liner: Clamped between the two parts of a traditional 3-piece drain.
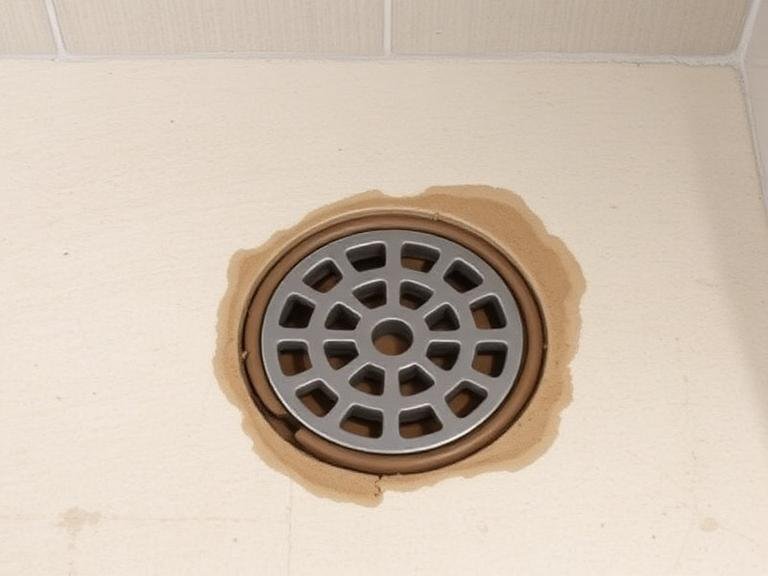
Once the waterproofing passes a leak test (plug the drain and fill the pan with water for 24 hours), you can proceed to tiling. Use thin-set mortar designed for wet areas. Grout the tiles, seal the grout, and install the decorative drain grate. Your project is now complete.
9. Summary Comparison Table
Choosing the right drain type affects your installation process. Here is a quick comparison.
| Feature | Standard Point Drain | Linear Drain (Noahhometech) | Invisible/Tile-In Drain |
|---|---|---|---|
| Slope Required | 4-way funnel slope | 1-way single slope | 4-way or 1-way |
| Tile Size | Small mosaics preferred | Large format tiles possible | Any size |
| Installation | Standard difficulty | Requires precise leveling | Requires precision cutting |
| Aesthetics | Traditional | Modern/Sleek | Minimalist/Hidden |
| Flow Rate | Standard | High Volume | Standard to High |
10. Frequently Asked Questions (FAQs)
11. Conclusion
Learning to replace shower drain in concrete floor environments is a high-level DIY skill that rewards you with a transformed bathroom and significant cost savings. While the prospect of jackhammering concrete can be intimidating, breaking the project down into these six manageable steps clarifies the path forward. By focusing on proper excavation, selecting high-quality materials like those from Noahhometech, and adhering to strict waterproofing protocols, you can solve your plumbing issues permanently.
Whether you opt for a sleek linear wall drain or a classic square fixture, the foundation of a successful shower lies in the preparation beneath the surface. Take your time, prioritize safety, and ensure every connection is watertight before pouring that final patch of concrete.