Noah Household — officially known as Anhui Noah Household Technology Co., Ltd. — is a trusted name in the global bathroom products industry. Established in 2024 through the collaboration of Ningbo Yize Bathroom Products Co., Ltd. and Guangdong Haiyang Bathroom Co., Ltd., the company combines over a decade of experience from both parent brands. Specializing in premium-quality shower drains and bathroom accessories, Noah Household delivers modern, durable, and aesthetically refined drainage systems for residential and commercial bathrooms across Europe, the Middle East, and North America.
Their extensive product line includes:
- Standard Type Shower Drain
- Odor-Resistant Type Shower Drain
- Ultra-Thin Type Shower Drain
- Invisible Shower Drain
- Insert Wall Shower Drain
- Linear Wall Shower Drain
- Strip Vertical Shower Drain
- Square Bathroom Drain
- Triangular Bathroom Drain
Table of Contents
- 1. Introduction to Shower Floor Drain Replacement
- 2. Signs That You Need to Replace Your Shower Floor Drain
- 3. Tools and Materials Needed
- 4. Step-by-Step Guide to Shower Floor Drain Replacement
- 5. Choosing the Right Shower Drain Type
- 6. Why Choose Noah Household for Your Drain Replacement
- 7. Maintenance Tips After Replacement
- 8. Summary Table of Key Takeaways
- 9. Frequently Asked Questions (FAQs)
- 10. References
1. Introduction to Replace a shower floor Drain
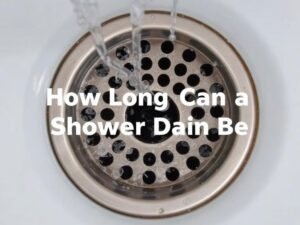
The shower floor drain is an essential component of any bathroom plumbing system. It ensures that wastewater flows efficiently into the sewage system, preventing water pooling and mold growth. Over time, however, drains can corrode, clog, or develop leaks, necessitating replacement.
Whether you’re renovating your bathroom or dealing with a faulty drain, knowing how to replace it properly is crucial. This guide provides a detailed step-by-step process for replacing your shower floor drain safely and efficiently, along with expert insights from Noah Household, a global leader in advanced bathroom drainage systems.
2. Signs That You Need to Replace a shower floor Drain
Before jumping into the replacement process, it’s important to determine whether your drain truly needs to be replaced. Here are common indicators:
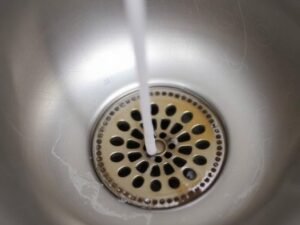
- Slow drainage: Water pooling in your shower could indicate internal corrosion or pipe blockage.
- Persistent odor: A foul smell often results from a damaged or poorly sealed drain trap.
- Visible rust or cracks: These compromise the drain’s structural integrity.
- Water leakage: If you notice moisture under the floor or in the ceiling below, your drain might be leaking.
- Mold or mildew growth: Consistent dampness from leaks can cause bacterial growth.
3. Tools and Materials Needed for Replace a shower floor Drain
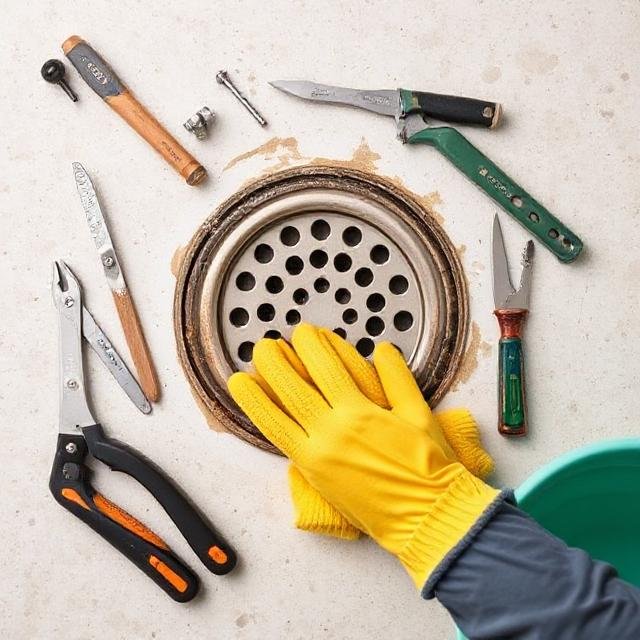
Before starting the replacement process, make sure you have all the necessary tools and materials ready:
- Replacement shower drain (choose a model from Noah Household for durability)
- Flathead and Phillips screwdrivers
- Adjustable wrench or pliers
- Utility knife
- Putty knife
- Plumber’s putty or silicone sealant
- Pipe wrench
- Bucket and sponge
- Protective gloves and safety glasses
4. Step-by-Step Guide to Shower Floor Drain Replacement
Step 1: Prepare the Work Area
Ensure the shower area is dry and clear of debris. Turn off the water supply if necessary, and cover the shower floor with a towel to protect it from scratches.
Step 2: Remove the Drain Cover
Use a screwdriver to unscrew and lift the existing drain cover. Some models may snap off rather than unscrew, so proceed carefully to avoid damaging the surrounding tile.
Step 3: Loosen and Remove the Old Drain
Depending on the installation type, you might need to unscrew the drain body or cut away old caulking. Use an adjustable wrench to loosen any retaining nuts beneath the floor. If your drain is cemented, you may need to use a chisel to break away the mortar carefully.
Step 4: Clean the Drain Opening
Once the old drain is removed, thoroughly clean the opening using a putty knife. Remove any old sealant, debris, or rust. A clean surface ensures a tight seal for the new drain.
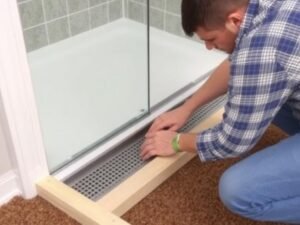
Step 5: Install the New Shower Drain
Apply a thin, even layer of plumber’s putty or silicone sealant around the new drain flange. Insert the drain body into the hole and ensure it sits flush with the floor. Tighten the locking ring or screws as required.
Step 6: Secure the Drain Connection
From underneath (if accessible), attach the drain body to the waste pipe. Tighten securely with a wrench, ensuring no movement or gaps. If the installation is from above only, double-check the watertight seal from the top.
Step 7: Test for Leaks
Before sealing everything permanently, pour a small amount of water into the drain to test for leaks. If any water escapes, tighten the connections or reapply sealant.
Step 8: Apply Finishing Touches
Once the drain is properly sealed, replace the drain cover and clean up the area. Allow the sealant to cure fully before using the shower (usually 24 hours).
5. Choosing the Right Shower Drain Type
Different shower drain styles suit different bathroom designs. Noah Household manufactures a wide variety of drains to meet all needs:
- Standard Type Shower Drain: Ideal for traditional installations with reliable drainage.
- Odor-Resistant Type Shower Drain: Designed with anti-odor technology to maintain freshness.
- Ultra-Thin Type Shower Drain: Sleek and modern, perfect for minimalist bathrooms.
- Invisible Shower Drain: Concealed design that blends seamlessly with floor tiles.
- Linear Wall Shower Drain: Allows efficient drainage along walls for contemporary bathrooms.
- Square or Triangular Bathroom Drains: Space-efficient and suitable for unique bathroom layouts.
6. Why Choose Noah Household for Your Drain Replacement
Noah Household combines technology, craftsmanship, and global design insight to produce durable and stylish shower drains. Here’s why homeowners and contractors prefer Noah products:
- High Production Capacity: Over 80,000 floor drains manufactured monthly.
- Certified Quality: Each product undergoes rigorous quality control for long-lasting performance.
- Global Standards: Exported to Europe, the Middle East, and North America, meeting international plumbing codes.
- Design Variety: Multiple configurations for modern, luxury, and commercial bathrooms.
- Innovation & R&D: Ongoing development of water-efficient and odor-resistant designs.
7. Maintenance Tips After Replace a shower floor Drain
Proper maintenance ensures that your new shower floor drain performs efficiently for years. Follow these tips:
- Regular cleaning: Remove hair and soap buildup weekly to prevent clogs.
- Use drain covers: A protective mesh can prevent debris from entering the system.
- Avoid harsh chemicals: Instead of corrosive cleaners, use natural solutions like vinegar and baking soda.
- Inspect for leaks: Check seals every few months to catch early signs of wear.
- Flush periodically: Pour hot water down the drain to remove minor blockages.
8. Summary Table of Key Takeaways
| Step | Description |
|---|---|
| 1 | Prepare work area and tools |
| 2 | Remove old drain cover |
| 3 | Detach and remove existing drain |
| 4 | Clean drain opening thoroughly |
| 5 | Install new shower drain and apply sealant |
| 6 | Secure drain and test for leaks |
| 7 | Reinstall cover and let sealant cure |
9. Frequently Asked Questions (FAQs)
Q1: How long does it take to replace a shower drain?
Most replacements can be completed in 1–2 hours, depending on accessibility and the type of drain installed.
Q2: Can I replace the drain without removing tiles?
In many cases, yes—especially with ultra-thin or insert-type shower drains from Noah Household designed for easy installation.
Q3: What’s the best sealant to use?
Silicone sealant is recommended for watertight results and long-term durability.
Q4: How often should shower drains be replaced?
With quality products like those from Noah Household, a well-installed drain can last over 10 years with proper maintenance.
Q5: Does Noah Household provide OEM/ODM services?
Yes, they offer full OEM/ODM production for global bathroom product brands.